Showing posts with label tempera paint. Show all posts

Tuesday, February 17, 2015

Mixed Media Hearts


I wanted to share these Jim Dine inspired mixed media hearts made by my fifth graders. They are are colorful, fun and unique--just like the kids who created them. We made these on recycled cardboard tiles, approximately 4 x 6 inches in size.


First we applied a layer of gesso, and then used tempera paint for the heart and background. I instructed the children to use a contrast of warm and cool colors. We spent a day painting papers with tempera paint, texture tools, and foam stamps.


We used our papers to add a collage element to the entire piece. After the paper was added, we added some more color with oil pastels and sharpies. Last, but not least, we sealed with a glossy coat of Modge Podge. 


I'm planning on putting up all 85 of these on a bulletin board in the 5th grade hall. I'll be sure to post pics on Facebook when I get it done. My only regret was that it wasn't done in time to enjoy the entire month of February. There's always next year, right?!


Follow me on Instagram or Facebook to see what I'm up to on a daily basis.

Instagram

Monday, July 23, 2012

Placemat Lesson for Pre-Kinders


Here's a fun little lesson for pre kindergarteners. It's great for teaching shapes (rectangle, circles, triangles), primary colors, and patterns. We started out by printing a pattern on our rectangle placemat with our first primary color, RED. We used foam rollers and tempera paint on white posterboard.
We used rollers like these-to order click here.


These circles were pre-cut, but you could trace and cut depending on the time you have and age level of students. Next, students painted their plates with our second primary color, BLUE, with a big chunky brush.


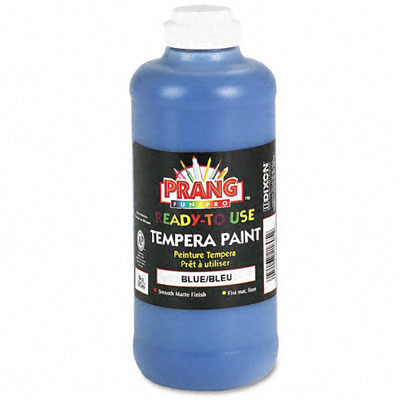
I love the ready-made tempera paint-click here for info.

After they were painted, we had fun with a little finger painting, and drew a pattern in the wet paint on the plate.


They each drew their own triangles and cut them out. Next step was introducing our third primary color, YELLOW.


Sponge stamping our pepperoni.


We practiced drawing our silverware before we painted it on.


Lastly, we glued everything together with some Elmer's glue. This project took about 1 hour from start to finish (class of 8).


These would also be cute stamped with a name or a cute phrase, and then laminated so they could really be used as a placemat.


Saturday, November 7, 2009

Mommy & Me


Can I say I'm an expert in "pre-school" art since I have a four-year old?? Fortunately, she LOVES art and is always willing to be my guinea pig for any new project. I started doing "Mommy & Me" classes once a month this fall so we could have some fun together with our friends. We had a blast in our first session painting landscapes without traditional brushes. Here's what we did, and below I've also listed some things that I've discovered work well with younger children.


Supplies: I used the back of paper grocery bags for our paper-they are free, a great size and durable. Just cut out the side that isn't printed, or you can use the back of the printed side if you like. Tempera paint in various colors. Cut sponges, sponge rollers, sea sponges, foam brushes.
Have fun with it, but be specific (I was working with 3 & 4 year olds)-For example, I started off by asking what they see when they go outside and look up? They answered "the sky". What color is the sky? "blue" Let's find the blue on your paint plate and paint the sky on your paper. Point to where the sky will be--will it be at the top or the bottom of your paper? "the top". Then I instructed the moms to show their child where to draw a blue line (for the horizon line) with the foam brush. Next they need to have the child paint everything above it blue. I continued this questioning process with the clouds, the sun, the grass, trees, flowers and the house. Ask questions about colors, shapes, lines and directions. The painting above was done by my 4-year old daughter during class. She did it all by herself-love the pink roof! They all turned out really cute, and I was impressed how well they all followed instructions and stayed engaged in the project.

My tips for painting with young kids (ages 3-6):

1.Focus on shapes and color, not on skills or outcome (it's about the process)
2. Don't present a sample before hand-it can discourage or want to make it "just like that one"- demos as you are explaining work well-I have my little one demo for me.
3. Go with the flow-if they really want to paint a cow and you're painting cats, let them.
4. Use big brushes, crayons, pencils, etc., so they won't get bogged down in the details.
5. Let them mix colors on the paper
6. Have everything prepared and ready to go for project-no waiting for next steps
7. Use smocks or aprons and have lots of baby wipes for messy hands
8. Don't paint or draw things for them, just specific give instructions (draw a circle, now, where do the ears go? Draw triangles where you just pointed.....etc.)
9. Limit session to around 30 minutes.
10. Lots of praise on the process-"You've done great covering your paper with this pretty blue", "What nice, big brush strokes".
11. Don't ever try to "guess" what something is. For example, "I love how you used the pink here", (Hopefully they will tell you it's a pig).
12.Keep your groups small (I did 4 kid/mom pairs)


Wednesday, November 4, 2009

Painting without brushes


This is a simple, but fun lesson that I got from 123 I Can Paint, by Irene Luxbacher. This book has some excellent lessons for younger students. I use this specific lesson to teach primary and secondary colors, as well as complimentary colors. It takes about thirty minutes, but if you want to let them actually mix their own secondary colors, you can stretch it out a bit. It's a great time filler and easy enough for 3-5 year old students. You will need color construction paper or I like the color railroad board, tempera paint, paper towels and a lot of 3 x 3 (or various sized) cardboard squares. Place a small blob of paint to the far left side of the paper (as high up as you want your building to be). I always demo this process once for the students---with the cardboard square, have the students pull the paint downward, off the edge of the paper. I usually put the complimentary colors beside each other so I can introduce this concept. Repeat this process across your paper, varying the colors and the "heights" or placement of the paint blobs-they can even overlap some to add perspective. Next, do a black blob of paint at the bottom and pull it across horizontally to make the road. Now with a wadded up piece of paper towel and some white paint, dab some clouds across the sky-they can even go over the tops of some of the buildings to make the sky scrapers seem "in the clouds". With the end of a paint brush, I have the students use yellow or white paint to add windows to the buildings, black paint for birds in the sky, and yellow for the lines on the road.

Thursday, October 29, 2009

Faux Batik


Here's a great project idea that I got from DickBlick. I've done these with kindergarten through 5th grade children. It does require a little more work on the teacher's part though because it's difficult to wash the glue off without washing off too much of the paint. I washed the glue myself and also ironed and hemmed the edges with fabric glue. For more details see:
http://cdn.dickblick.com/lessonplans/pdfs/gluebatik.pdf

Monday, October 26, 2009

Pop Art Portraits


Pop art self portraits are a great way to introduce the primary colors, learn about artist like Andy Warhol and Roy Lichtenstein, and I always go over facial mapping and how to draw the facial features. It really gets students out of a box and lets them have fun doing a cartoon- like rendition of themselves. We used tempera paint. a large sheet of watercolor paper, and outlined everything in black to really make the colors pop.


You also might like....