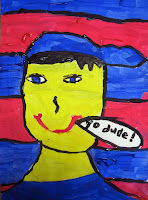
Making clay self portraits is always one of the favorites with the students-- and they turn out so darn cute! I use this lesson for teaching facial mapping with drawing portraits, and to teach simple clay hand building techniques like making slip and scoring/attaching. This project usually takes two to three, one hour classes. You will need Crayola Air Dry clay, acrylic paints & brushes, acrylic varnish, 8 x 10 or 9 x 12 canvas panel, Gorilla Glue, toothpicks, rolling pins, a sanding block and water. First I give a short lesson on facial mapping and drawing facial features. Then the students roll out their clay to about 1/2 inch thickness and cut into an oval shape. With the scrap pieces the students form the nose, lips and ears. I give them extra clay to make the hair. Then they lightly map out their features onto the clay with a toothpick. Once they get everything in place, they attach the nose, ears and lips. Next outline the eyes, eyelashes and eyebrows by "digging" in a little deeper with the toothpick. Now time to attach the hair and give it some texture. All done for today..... they need to dry for at least two days. Be sure to place on a flat surface. At this point, if there is time left, I have the students go ahead and paint their 9 x 12 canvas panel so it will also be dry and ready to mount their face to the next week.

Now that the clay is nice and dry, lightly sand the top to break off any loose debris and wipe off with a damp rag. Paint the whole piece a skin color, making sure the paint gets down in the cracks and on the sides. I usually put it in front of a fan for a few minutes to dry before moving on. Now mix up some hair and eye colors and let them finish painting. After this dries, I add a coat of Delta Cermacoat Satin varnish and use Gorilla Glue to attach to the canvas panel. These display nicely on a small easel stand, or you can take the glass out of a frame and insert panel to hang on the wall!


