Tuesday, February 28, 2012

In the studio


Thought I'd start posting on the last Monday of each month some of my personal art I've been working on in my studio during that previous month. So here some of the things I painted in February...


I'm trying to paint more with oils, but I always seem to default back to my bright, whimsical style in acrylics. It seems like I have so much more fun with it, and now I'm really into adding the papers and other media elements. I still feel like oils are so serious : ) 


I've worked on the above piece and oil piece above, over the last month for the Arts Festival at Fellowship Bible Church. The theme this year is All Things New. If you are a local or regional artist, or even just an art enthusiast, you have to check it out! Always wonderful art inspired by God's word.


I just opened my Etsy shop, so please stop by and check out my art there.


Follow Sleepyhead Designs Studio on Facebook!


And if you're local, I have art for sale at Scallions in the Heights and Pig Tails and Crew Cuts.


Also, if you are just visiting for the first time, thank you so much for stopping by! I'd love for you to follow me on facebook at Sleepyhead Designs Studio or subscribe to my blog feed!

Friday, February 24, 2012

Paint + Collage Process-Let's Paint Friday


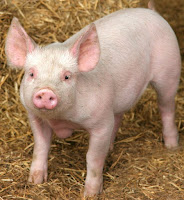
Here's a quick peek at how to do collage artwork like the Pig pictured above. This acrylic mixed media piece was done by one of my adult students, Dianna Huchingson, who is very talented, much more so than she gives herself credit. She did this piece in about 2 hours and used scrapbook paper, gloss medium, acrylic paint on a canvas panel.


She started out using a pig picture similar to this one as her reference/inspiration.


First she sketched out her basic shape, and then using gloss medium, she started glueing her torn papers into place.


Then using acrylic paint mixed with gloss medium, she filled in the white space.


A few more shadows and touches and she ended up with this cute little guy!


Friday, February 17, 2012

Abstract Painting Lesson Idea


Let's Paint


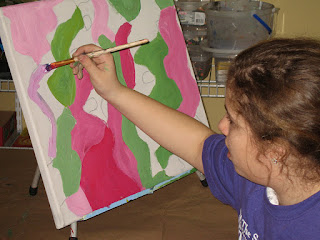
Using a piece of 10 x 8 tracing paper, students created used shapes and lines to create an abstract design. Then they transferred their image on the both sides of a 20 x 16 canvas to create a symmetrical design. These were painted on a stretched canvas with acrylic paints.


Monday, February 13, 2012

Simple Color Theory Lesson

Lesson Idea


Here's a simple, but fun exercise I do with younger students to introduce color theory. Thought I'd post since the hearts are appropriate for Valentine's Day, however, you can choose any simple shape or object you'd like. I've also done these in the spring with diamond shapes and had the students make them into kites. You could also tie this lesson into learning about Jim Dine.


These hearts were painted free hand, but I've done this project before with younger students and had heart shaped templates cut out of cardboard so the students could trace them.


These where done with acrylic paint on an 11 x 14 stretched canvas and sealed with a high gloss varnish. This could also be done on paper with other types of mediums.


As you can see, the canvas is divided in four sections. We started with the three primary colors, and then mixed our secondary colors. One square is warm colors; one is cool colors; one is primary and the last is secondary. The black outline really ties it all togethers, hides messy edges and makes it "pop".
Here's some more of my favorite Valentine's Day themed art lessons and art with hearts.

Thursday, February 9, 2012

Painting Abstract Hearts for Valentine Day

Let's Paint!


Thanks for joining me for my first "Let's Paint" post! 
Here's a fun painting idea perfect for Valentine's Day, and can even be tied to learning about artist Jim Dine. We used acrylic paints and a 12 x 12 stretched canvas. Painted in a loose abstract style, we used warm colors for the heart and cool colors for our background.


We used a little gel medium to collage on some coordinating papers, and then broke out the glitter!
 I love the way these turned out!


Join me each Friday for a quick "Let's Paint" idea!

Wednesday, February 8, 2012

Valentine Bookmarks from Canvas Fabric

Get Crafty


So, since Valentine’s day is coming up, I thought I’d show you an easy gift idea for friends and teachers.  Here's an simple and inexpensive, yet unique and handmade idea created from cotton duck canvas fabric. Why canvas fabric? Well, it's sturdy and easy to paint on...and I had a bunch of scrap pieces at my house that I was needing to recycle! Cotton duck canvas is also great for creating floor cloths, placemats and fiber art hearts. This is my favorite style of book mark because it not only holds up, but the elastic band holds the pages in place, even in large bulky books.

 
Here’s the supplies I used for this project-but the wonderful thing is, you can make it as elaborate or simple as you like, and it’s not limited just to Valentine’s Day. Just put your own spin on it! This would make a great gift for a best friend, teacher or classmate. 
-Small scraps of 100% cotton duck canvas fabric (You can get this at any fabric or craft store that carries fabric for usually around $5 per yard.)
-Acrylic Gesso (this primes the fabric so you can paint on it)
-Acrylic paint and paint brushes
-Scrapbook paper pieces
-Gel or gloss Medium
-1 elastic headband-9 inches (I have these all over my house, but you can get them at discount stores everywhere) or just use a piece of elastic
-fabric or craft glue
-Black permenant marker (Sharpie)
-large needle and embroidery thread
-scissors
Optional Embellishments:
-thin ribbon scrap (4-6 inches)
-Printed words or sayings

First: I started out with an approximately 4 inch by 10 inch piece of canvas material. Cover both side with a layer of gesso and allow to dry. Next, mix your paint with the gel medium and paint three even sections with different colors. I recommend selecting three colors coordinated with your available scrapbook papers. The gel medium makes the paint glossy and flexible when it dries, plus it gives it a cool painterly look. While the paint is still wet, tear up coordinating scrap book paper pieces and stick into the wet paint. Allow to dry. 
Note: Since the desired look of this craft is fun and whimsical, don’t worry about doing it all perfectly. This also allows this to be fun and easy for kids to do.

 
Cut out one color (3 x 4 inches) and fold over so you can out a heart with a front and back-you can draw your heart on the back first with a pencil if needed and then retrace for the backside. My heart was about three inches in length and two inches wide. Cut the remaining color strip to about 3 inches wide and 6-1/2 inches long. Fold in half lengthwise and make a good crease.

Next you will need your elastic piece. I used an old elastic headband, because with three girls it seems like I can find one lying on the floor at any time. You can also use regular elastic. My band measured 8-1/2 inches long. Using a big needle and thick thread, poke two small holes in the canvas and then secure the band from the unpainted side of the canvas. I left the finishing thread ends out on the painted side so I could tie on a cute little bow.

Now glue the long sides together to cover the band. Next is the fun part; to decorate and embellish. I used a black sharpie to add designs, cut out words printed from my computer (Free Fonts by Kevin and Amanda), and added the cute little dangling heart with a ribbon. The heart is lightly stuffed to give it more dimension.


Happy Valentine's Day!


You also might like....